SendGrid is a great and cost-effective tool for Email Marketers to send high-quality emails with a good sending score rate.
In this SendGrid Domain Authentication guide 101, we will show and explain, step-by-step, how to authenticate a domain on SendGrid.
One important point that marketers often overlook is the pressure that makes email marketing so susceptible to spamming. Careless or malicious practices can ruin the potential for a new business opportunity and should be avoided. Spam is annoying, impersonating, and whatnot. Just saying 🙂 Domain authentication is a vital tool to ensure that your emails are well-protected and secure, meaning they end up in the inbox of the person you sent them to.
SendGrid Domain Authentication
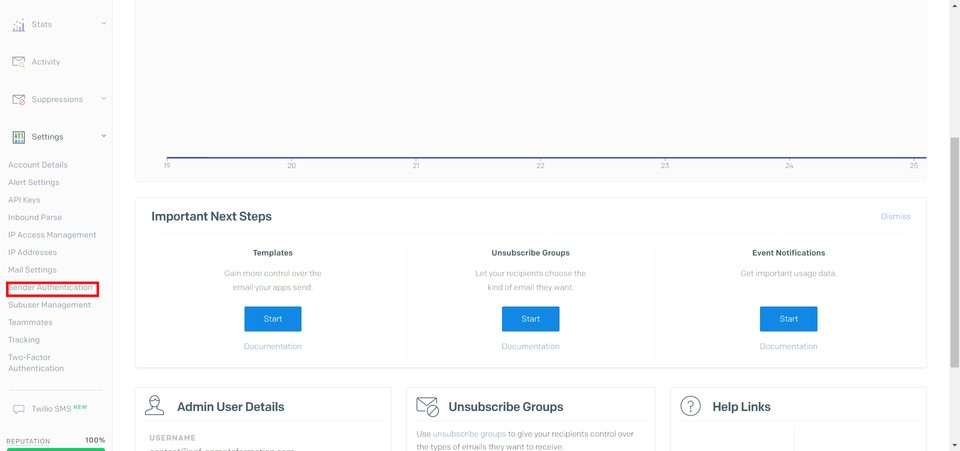
Go to your SendGrid account and click on Settings, then click on Sender Authentication

Click on get started

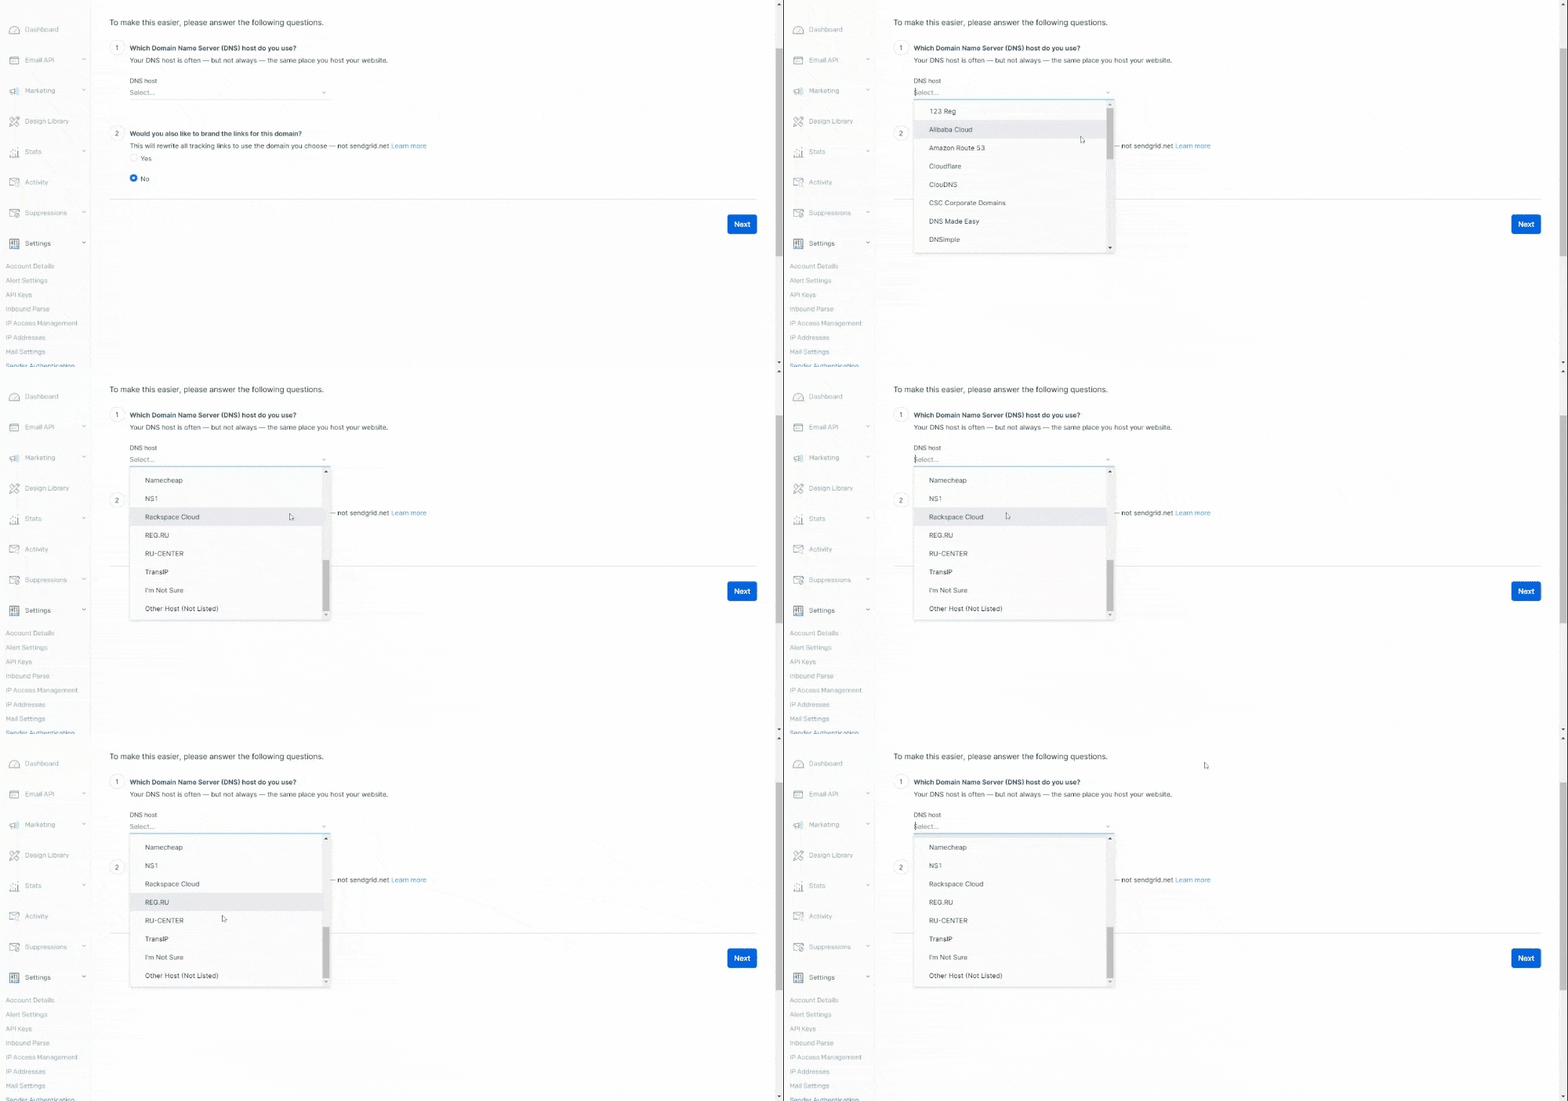
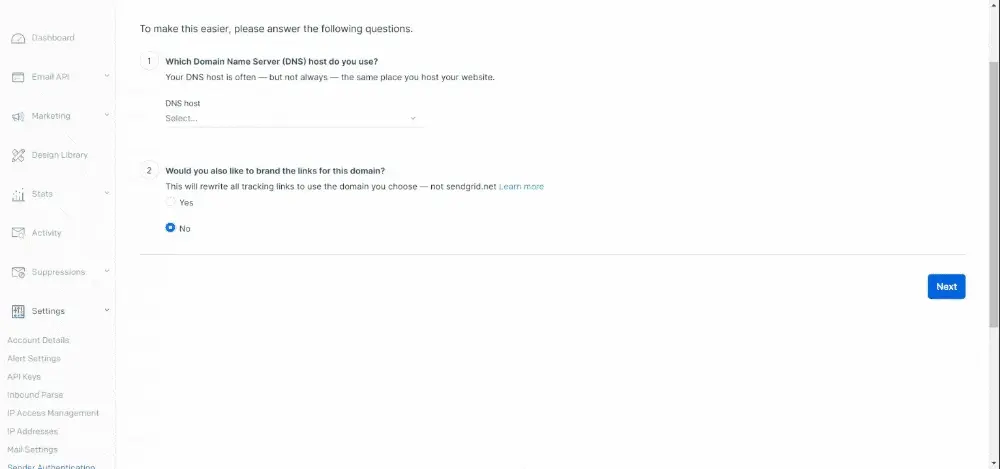
Choose the right provider from the selection. If your provider is not listed on the selection, just select “Other”

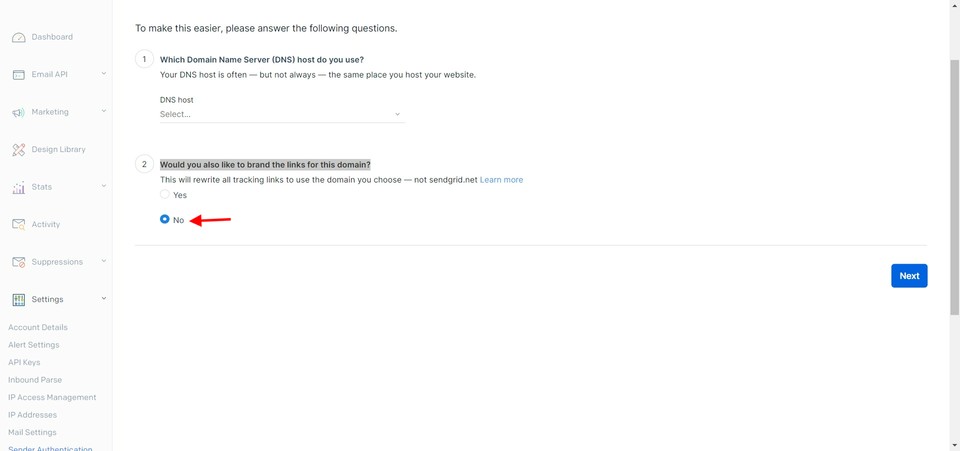
At the same time, you can keep the answer to “Would you also like to brand the links for this domain?” as “No”

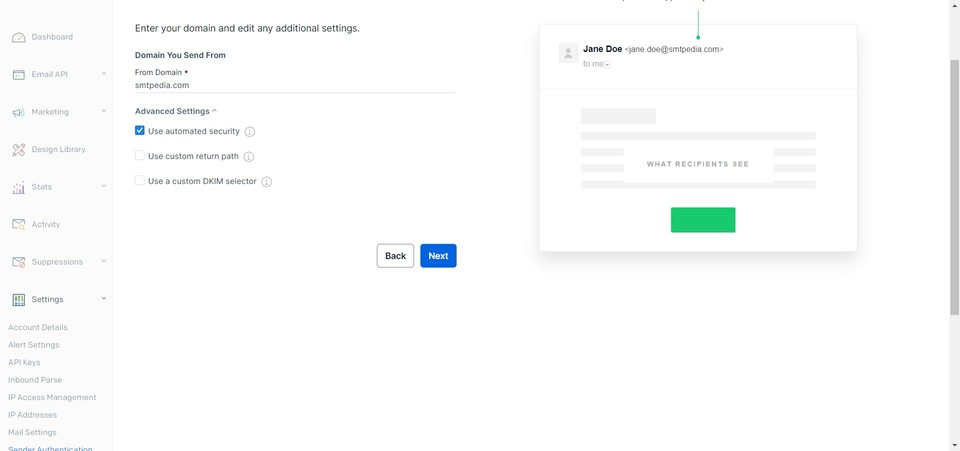
Type the domain name of your domain and press Next. If you do not have an advanced knowledge with domain authentication, just keep the advanced settings as they are

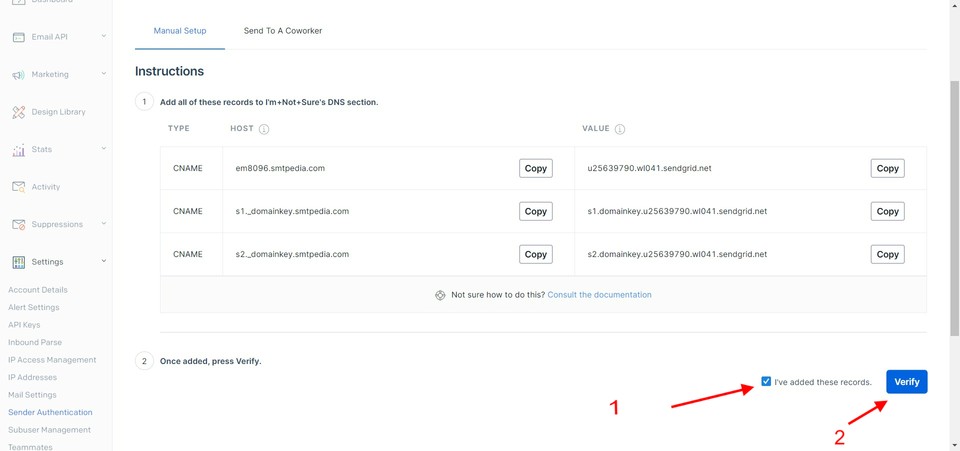
Go to your webhost, in the DNS section and implement all the CNAME records to the DNS host. Copy paste all the CNAME records and the values

Once all the process is done, check the “I’ve added these records” and click on Verify

Congrats, your Domain Authentication in SendGrid is done successfully
If you have many sending domains to authenticate, you can repeat exactly the same steps.
The advanced settings (optional)
Setting up multiple SendGrid domains doesn’t require any special settings, it just depends on your personal needs and preferences. Among the Advanced settings, you can experiment with the following:
Automated security
Sendgrid will sign your DKIM and authenticate your SPF automatically for emails with CNAME records. This does not mean that you don’t have to do the copy/paste task.
Custom return path
this feature will allow you to customize your subdomain.
Custom DKIM selector
this feature is created to help you authenticate your domain many times.
SendGrid MX records (optional)
In the event that you were unsure about what a SendGrid MX record does, it’s an email MX record. This particular type of DNS records identifies which server will handle emails corresponding to the recipient’s domain name. If you switch off the automated security you need to fill out the TXT and MX records. This is in contrast to the CNAME records mentioned previously.
Some providers automatically add your domain to new DNS entry values, but if this happens the CNAME will contain too much data and then authentication will fail. One of the common reasons for SLIP interruptions is that a domain server is sending too much data. A way to test this and see if it’s true for your site is to check the CNAME entries attached to your site.
For people who are curious about how a CNAME record looks in order to figure out how to create them on their DNS, we recommend they simply follow the example:
Ensure that you don´t change the VALUE and POINT TO fields
It takes up to 48 hours for the records to be verified after they have been uploaded, so if you want to review them, you’ll need to return to sender authentication and press verify.
Single Sender Verification
It’s recommended also to use the Single Sender Verification feature to verify the ownership of a single email address to use as a sender. For this, follow the steps below
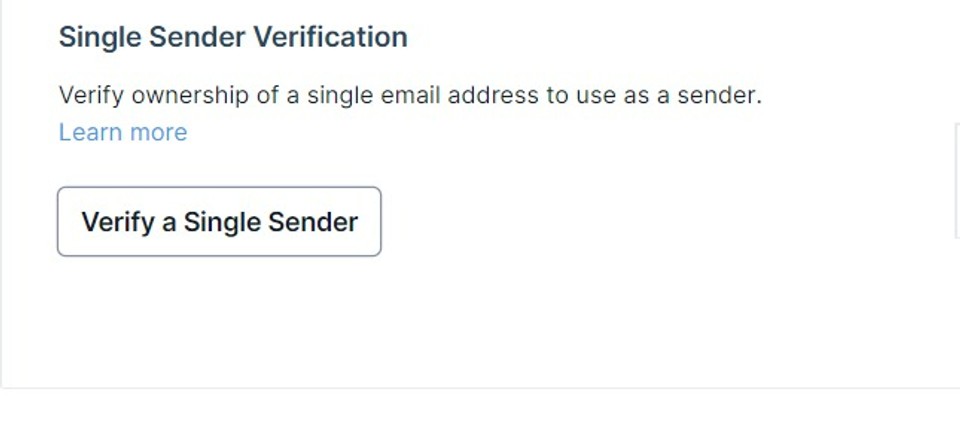
Click on Verify Single Sender in the Sender Authentication subsection

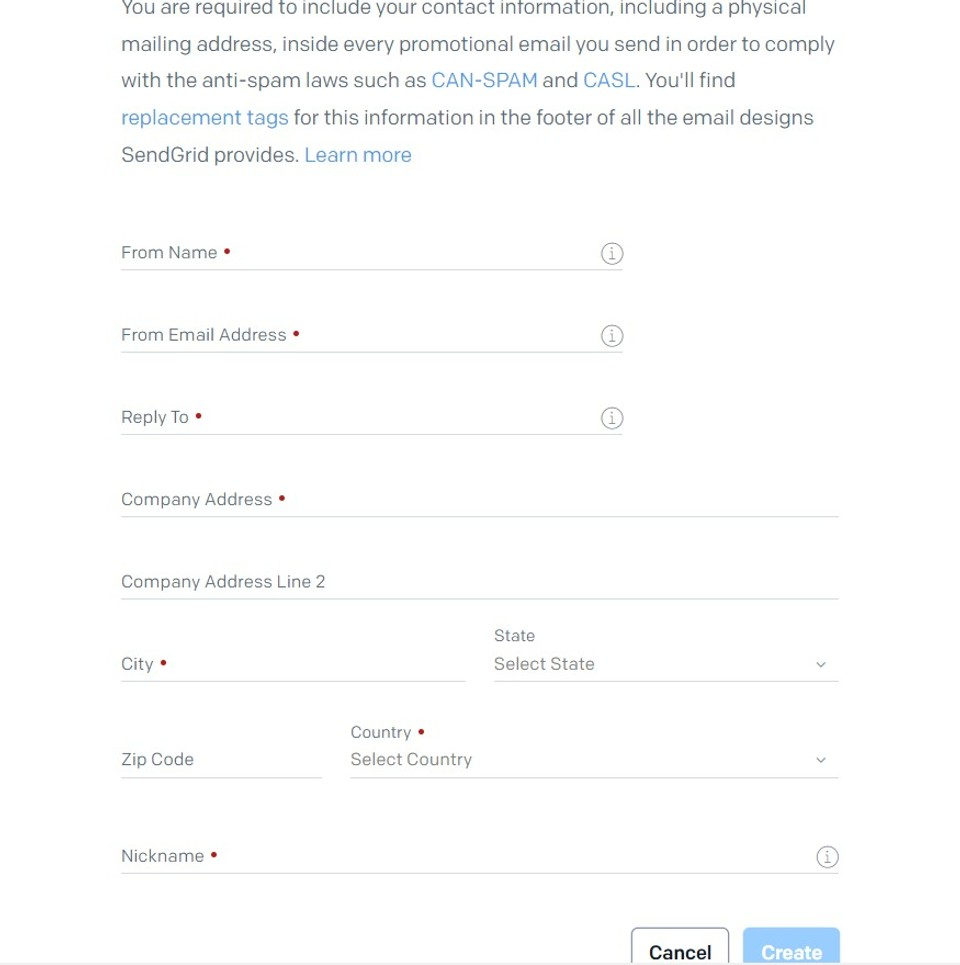
Fill in this form with your coordinates and your sending email will get directly authenticated

Congrats, your sending email is authenticated
Final thoughts
With SMTP and domain authentication, you’ll not only enjoy easy email delivery and high open rates but also protection against landing in spam boxes. Email Marketing, and other broadcasting tools like social media, are always a matter of common sense.
And always, before you send your campaign, do not forget to include the unsubscribe tag. You can find the one related to your Email Marketing Platform on this link.
For further information abdout this platform, you can check this Sendgrid Reviews.

